Is HyperX Cloud 2 mic not working on your PC? Take it easy because here you’ll get to know how to fix this issue in a few minutes.
Many gamers, music enthusiasts, and binge-watchers enjoy the crystal clear and crisp sound produced by the HyperX Cloud 2 headphones, which are highly popular among them.
This next-generation gaming headset from HyperX is equipped with simulated 7.1 surround sound to provide you with the most immersive and optimal Hi-Fi gaming experience imaginable in any environment.
However, some customers have recently complained that the microphone on their HyperX Cloud 2 headset has stopped working after upgrading from a prior version of Windows.
If you are one of the clients who has been impacted, there is no need to be concerned because there are numerous easy remedies available to deal with the HyperX Cloud 2 microphone issue.
However, before we get into specific solutions, let’s have a look at the most common reasons why your HyperX Cloud 2 microphone is not working correctly.
Why Is HyperX Cloud 2 Mic Not Working
The following are some of the most common reasons you cannot utilize the microphone on your Cloud 2 headset.
- The HyperX Cloud 2 headset is not correctly attached.
- The headset has been muted.
- The audio hookups were incorrect.
- Sound settings that have been incorrectly adjusted.
- The audio or sound card driver is either missing or out-of-date.
How To Fix HyperX Cloud 2 Mic Not Working
The HyperX Cloud 2 headset requires updated drivers and steady wiring to work, so if you have issues with these, rechecking your connection and updating your audio drivers should fix your headset.
There are some more fixes to try if your problem is not related to these.
So, here are the steps to fix HyperX Cloud 2 mic not working:
1. Keep Steady Cable Connection
The audio will not work if your HyperX Cloud 2 microphone is muted or not correctly connected to your headset. Even if it’s unlikely that the physical connection is the root of the problem, you should rule it out as a possibility because most people forget to unmute their headphones when they want to speak in front of a group.
Consequently, we recommend that you first check the mute settings on the headset as well as the cable connection between the headset and your laptop or desktop computer before proceeding any further.
- When using the USB switch selector, it is critical to ensure that you have not inadvertently pushed the mute button by mistake.
- The USB port is selected with its selector.
- Double-check to make sure that all of the connectors are correctly connected before continuing. Consider putting the headset cord into a different port to see if it makes a difference.
2. Update Audio Drivers
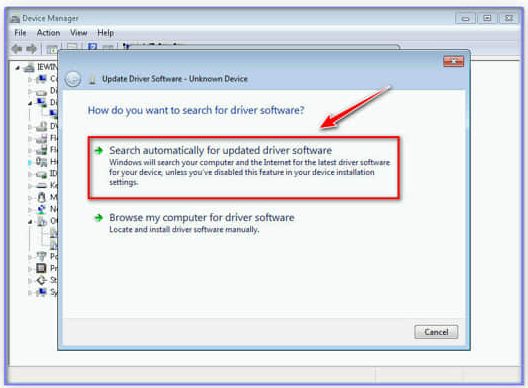
The microphone on your HyperX Cloud 2 headset will not operate if you are running an incorrect or out-of-date driver on your computer. As a result, you should try upgrading the driver to see if it helps to address the issue. You may choose between manually upgrading your driver and automatically updating your driver.
Due to its time-consuming nature, technological complexity, and potential for harm, we will not cover the manual method in this section. Additionally, unless you have considerable technical skills and experience, we do not recommend it. The procedure of automatically upgrading your driver, on the other hand, is relatively straightforward. Also, read how you can fix HyperX Cloud Alpha mic not working.
Once Driver Easy has been installed and launched on your computer, it will automatically discover and install the most recent drivers for all of the devices on your computer that require them, saving you both time and hassle. Here’s how you can put it to good use:
- Download free Driver Easy and install.
- Start Driver Easy and click on the Scan Now button to search your computer for outdated drivers and software. If your machine is incompatible with the drivers, Driver Easy will detect this and alert you to the problem.
- Click the Update icon next to the headset on the toolbar to get the most recent and correct driver for the headset.
- To have your computer automatically update all outdated or missing drivers, you can also select the Update All option from the drop-down menu at the bottom right of the screen. (If you do not already have the Pro version, you will be prompted to buy it when clicking Update All.)
After you’ve completed the process of upgrading the driver for your HyperX Cloud 2 headset, restart your computer to complete the process. Next, re-enter your username and password to see whether the microphone is still not functioning correctly.
3. Get Latest Windows Updates
It is possible that your operating system has corrupted files or configurations that prevent the microphone on your HyperX Cloud 2 headset from functioning correctly. If updating Windows doesn’t work you can even reinstall the windows operating system newly.
Prior to proceeding, make a backup of any critical files on your computer and then follow one of the procedures listed below. If you are using Windows 10, you may reset your system by following the steps-
- Use the installation CDs that came with your computer when you purchased it to reinstall Windows if you are currently running an earlier version of the operating system.
- After resetting or restarting Windows, you’ll need to reinstall your headset according to the instructions provided to you.
4. Fix Device Sound Settings
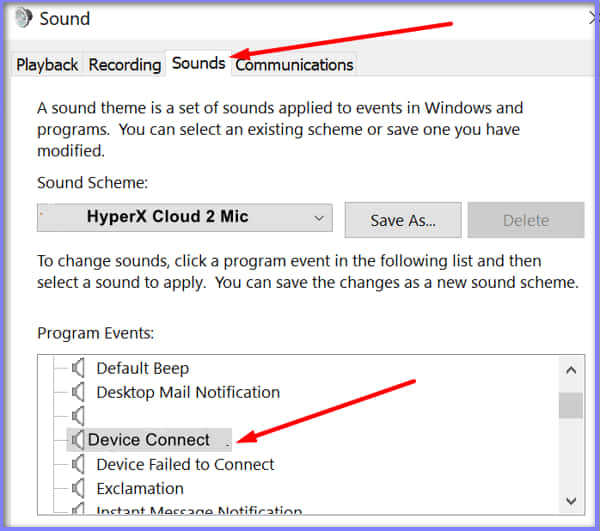
Maybe the reason behind your HyperX Cloud 2 is quite your faulty sound settings. The likelihood that the volume on your device is muted may lead you to assume that your microphone is not working correctly. Verify that the call volume and media volume on your device are not set to a deficient level or are entirely muted by checking the sound settings on your device.
If this is the case, just boost the call volume on your device, as well as the media volume, to make up for the loss. Also, your computer may be experiencing HyperX Cloud 2 mic not working on Windows 10 issues if you have accidentally muted, disabled, or failed to set up the microphone as the default device on your computer.
Please continue using the procedures indicated below to re-enable your microphone and set it as your computer’s default input device once more.
- Click the Speakers icon, which can be located in the lower-right corner of the taskbar, and then select Recording devices from the context menu that appears after right-clicking.
- By right-clicking on a vacant area of the window and selecting Show Disabled Devices, you can see all of the disabled devices on your computer.
- To enable the HyperX Cloud 2 Headset Microphone, make a selection with your right mouse button and then pick the Enable option from the context menu that displays.
- Right-clicking the Headset Microphone a second time will bring up the same context menu, which will allow you to pick the option to Set as Default Device once again.
- Finally, click Apply and then OK to ensure that the adjustments are preserved.
5. Enable HyperX Cloud 2 Headset
Another immediate solution for the HyperX Cloud 2 microphone not working problem is to double-check whether or not you have granted permission to the programs to access your microphone through your computer’s security settings. Here are the procedures that must be followed in order to enable app permissions for your microphone on a Windows 10 device.
- To access the Windows Settings app, press the Windows logo key and pick the gear symbol on the taskbar.
- Select Privacy from the drop-down menu under Settings.
- Select the Microphone option from the left-hand navigation pane.
- Toggle the Allow applications to access your microphone toggle button to the enabled position.
6. Troubleshoot Audio not coming from HyperX Cloud 2
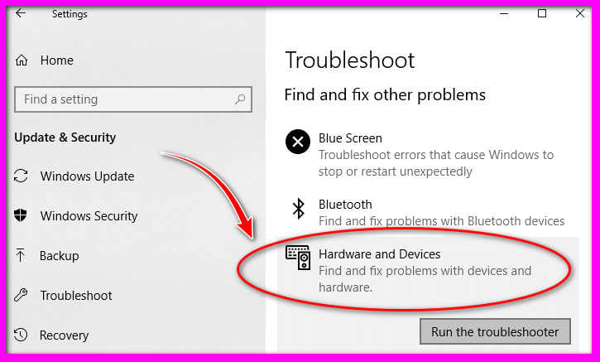
You can also try using the built-in troubleshooter in Windows 10 to troubleshoot the HyperX Cloud 2 microphone not working issue you are experiencing.
Follow the steps below to troubleshoot audio.
- To troubleshoot sound problems, just right-click the Speaker icon in the bottom-right corner of the screen and select Troubleshoot Sound Problems from the drop-down option that appears. Then, in order to begin troubleshooting, follow the onscreen instructions and implement the recommended solutions.
- If the HyperX Cloud 2 mic is still not working after you have finished troubleshooting, restart your computer to check if the problem persists.
The HyperX Cloud gaming headset performs admirably in terms of audio quality. They boast minimal latency, a connected USB connection, a somewhat well-balanced audio reproduction, and a fantastic noise filtering microphone, among other features.
With velour ear cushions, it is a highly adjustable gaming headset that delivers the best degree of audio fidelity, comfort, and noise isolation. While utilizing the HyperX cloud two headsets on their Windows 10, Xbox One, and PlayStation 4 devices, a substantial number of consumers are encountering technical issues. We have tried our best to provide you with quick solutions for HyperX Cloud 2 headset not working; hopefully, you have found your desired fix.
FAQ
Why is my mic not working on Xbox?
Firstly, make sure that your microphone is not muted, and secondly, make sure that Auto-mute is not set to High in your headset’s settings (try turning Auto-mute off). Restarting both devices may be necessary if the previous step does not address the problem. If it doesn’t cure the problem, you may try a hard reset on the headset itself.
Why is Hyper Cloud 2 microphone quiet?
Your microphone can be quiet because of wrong volume levels; check sound settings and frequency to turn up the volume and fix it.


