
Almost all electronic devices have an implanted sleep mode. You can call it a standby mode or a low power mode which is a great source of saving power consumption. Whenever we turn our devices’ sleep mode on, the status of RAM gets suspended, and the hard disk and screen stop working. Well, sometimes the PC won’t go to sleep on Windows 11 due to incorrect Windows settings, non-updated drivers, and so on.
Numerous solutions can prevent you from screwing up the sleep issue. Which solution would be the best for you depends on your reason. However, the following concept can help you to fix your Windows 11’s sleep mode and make it work flawlessly.
Sleep Mode In Windows 11
Usually, electronic devices save electric bills and power consumption in a specific feature, i.e., the low power mode. This mode also refers to a sleep mode.
Most often, we perform our last session and leave them awake. At that time, the device loads them and takes the help of sleep mode to remove the disruption of the application reopening.
If your electric bill is breaking the bank, Windows 11’s sleep mode is going to be a handy feature for you. Because the desktops sometimes pause and rest without turning off the device properly. At that instant, you will have to restart your work again from scratch. To make sure none of your toils go bland, fix the sleep mode right now.
Why Is Sleep Mode Useful?
As said before, sleep mode is a useful feature for saving our device’s power consumption. It thereby puts the PCs in a low-power state and allows us to resume our work from exactly where we stopped. And we can’t even think without the sleep mode when it comes to saving the devices’ battery consumption without turning them off. Although hibernation and sleep mode offer saving power, they are not completely the same.
Hibernation mainly works on minimizing power consumption. It saves the current settings on hard disks instead of switching off the devices. On the other hand, the sleep mode puts desktops on energy-saving mode and lets us resume our work from where we left off.
Why Does Sleep Mode Fail To Work?
The main cause for which a sleep mode does not work is the complications between software and hardware during times of start-up. Before executing any steps, it is better to restart your PC in safe mode and check if it goes to sleep or not. When the sleep is working perfectly, just perform a clean boot to eliminate the faults.
How To Fix PC Won’t Go To Sleep Windows 11 Problem.
Although fixing a PC’s sleep mode may seem a complicated task, it is not rocket science either. Without exaggerating anymore, let us see what steps can be helpful for us to solve this problem:
1. Check your Window’s sleep mode settings
Before fixing the sleep mode of your Windows 11, it is better to give it a check. Let’s see how to do that.
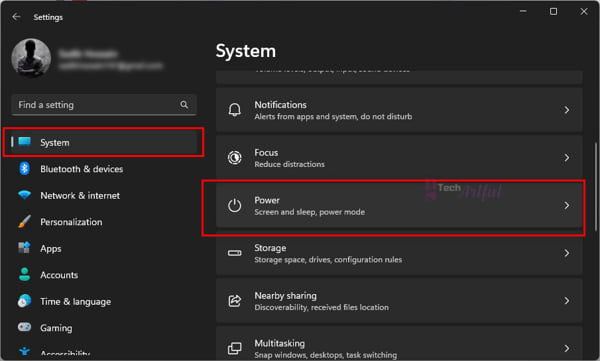
- Open the Setting app by pressing the Windows + I keys on your keyboard simultaneously.
- Your System should be selected on the left side of the panel.
- Browse the available items given on the right panel and click on Power.
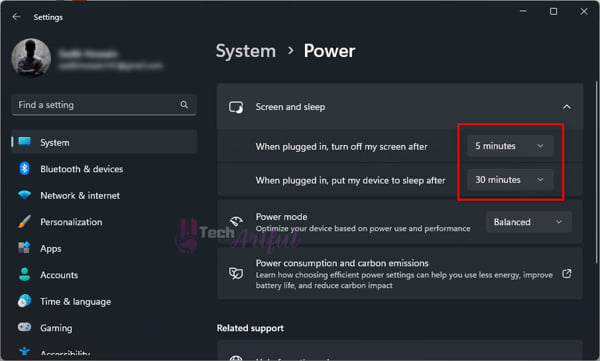
- Click on the Screen and Sleep option so that you can expand it.
- There are given times in When plugged in, put my device to sleep after, and When plugged in, turn off my screen after. Check them precisely.
- Your device may be set to Never.
2. Enable the sleep mode in a manual way
Unless you enable the sleep mode of your device, it will fail to sleep at the required times. Anyways, let us figure out the exact steps on how we can enable the sleep mode in Windows 11.
- Go to the taskbar and select Windows Search.
- Now click on Settings after searching it.
- Click on the Power options given on the system panel.
- Set a specific time to put your device and screen in sleep mode.
- Now exit the setting panel.
Ever and again, the following technique may not ace up the result. In this respect, another technique is there to help you.
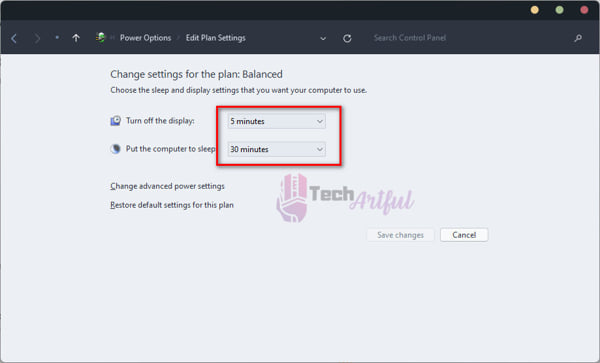
3. Edit The Setting Of The Power Plan
The Power panel setting on Windows 11 is available on the control panel for making power settings.
- First, look for the Control Panel at the taskbar’s search option and enter it.
- Select the Hardware and Sound
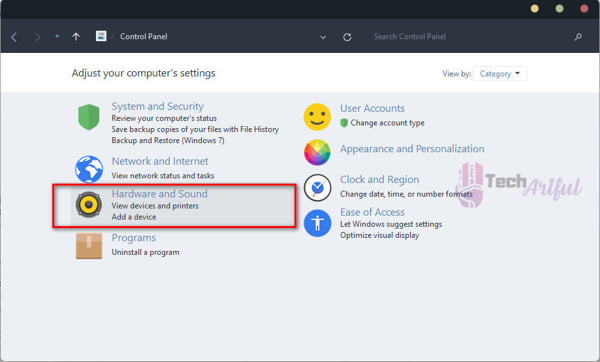
- Now click on Power Options and select Change Plan Settings.
- Now customize the options so that your PC sleeps at the given time.
4. Disable The Hybrid Mode
There is always a combination of hibernate mode and sleep mode in every Windows 11. This combination is none other than the Hybrid Mode. It can put any device to sleep and easily stores essential data on hard disks.
If you are a workaholic and often work for a long duration, the given steps are just for you. These will help you to disable the hybrid effortlessly.
- Click on the Search icon and look for the Control Panel.
- Go to Hardware and Sound, and then Power Options.
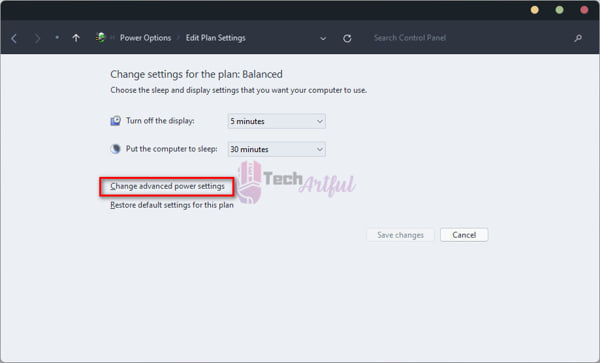
- Click on the Change Plan Settings option on your preferred plan.
- Hit the Change Advanced Power Settings
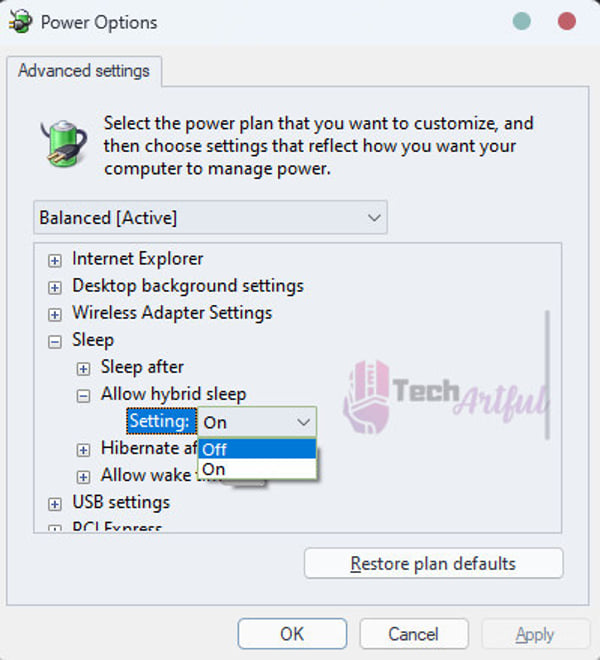
- Now next to the Sleep option, expand the menu by clicking on the (+) plus
- Select Allow hybrid sleep and turn it Off.
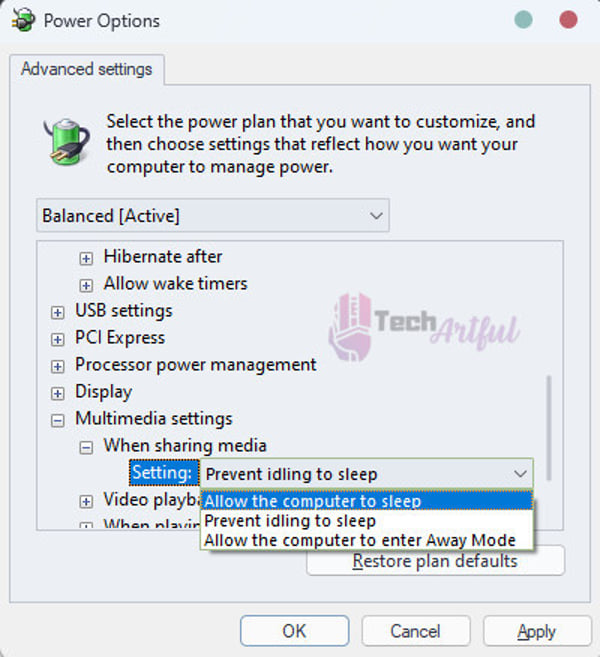
- Below the Sleep option, there is a Multimedia setting; select it and go to the When Sharing Media. Afterward, select Allow the computer to sleep given on the drop-down menu.
5. Disable All Wake Timers
Most users use the wake timers as time events that help to wake up their devices. You can disable this timer by going to the control panel or the command prompt. But if you want easy access, the control panel would be suitable. Now check out its steps below:
- Open the Control Panel of your Windows 11 and go to Hardware and Sound, and navigate to the Power Options.
- Select Balanced plan and Change Plan Settings.
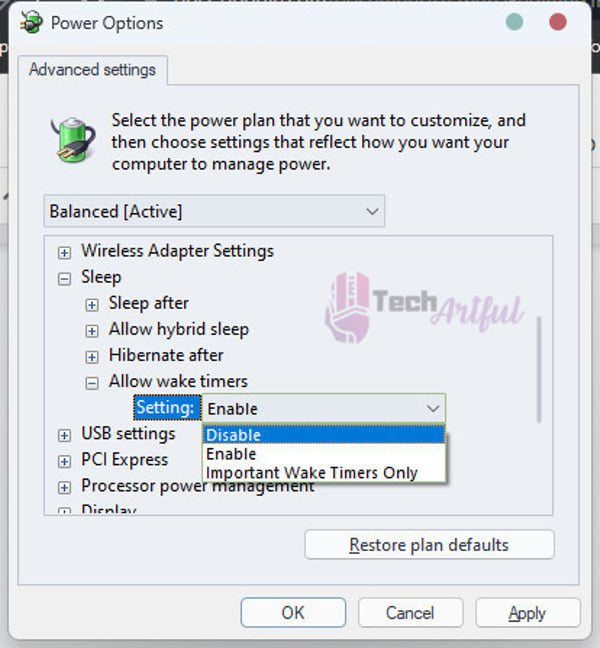
- Just like disabling the hybrid mode, here, you also have to select the Change advanced settings and press on the (+) icon beside the Sleep
- You will see an option to Allow wake timers, tap on it and select Disable.
- Lastly, close your control panel.
6. Deactivate Your Fast Start-Up
Generally, the PCs come up with a fast startup feature that helps to boost after shutdown. Since we are talking about Windows 11, you have to enable its fast startup by default. Still and all, the fast startup feature is simply visible on the control panel of this device.
Before commencing the steps, remember that older desktops and laptops mostly fail to deactivate the fast startup. Let’s put a pin in it for now and go through the steps of disabling the fast startup in our Windows 11.
- Like before, you have to open the Control Panel as well and select the Hardware and Sound Then choose the Power options and click on Choose what the power buttons do.
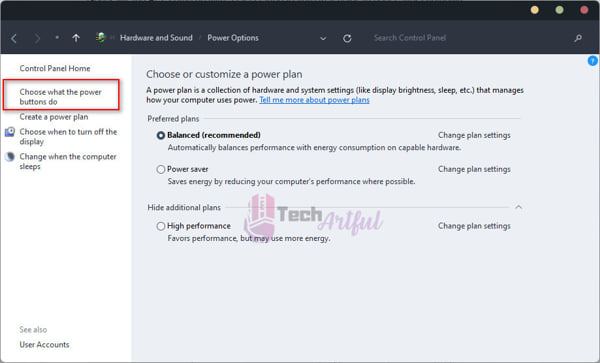
- Now select Change settings that are currently unavailable.
- At last, you have to uncheck that particular section that says Turn on fast startup.

7. Turn Off Your PC’s Screensaver Mode
This step is one of the most time-saving steps as it takes only four brief tasks.
- Click Windows + S on your keyboard simultaneously.
- Write Change screen saver and hit Enter.
- Click None given below the screen saver.
- Now click Ok.

8. Editing Power Plan Settings
It is another effective way to fix our Window 11’s settings app. Because the setting app is also a reason that hampers the working of sleep mode, nevertheless, it has a superb solution below:
- Click on Windows + S.
- Type “Choose a power plan” with the help of your keyboard and tap Enter.
- Now go to the left panel and click Change when the computer sleeps.
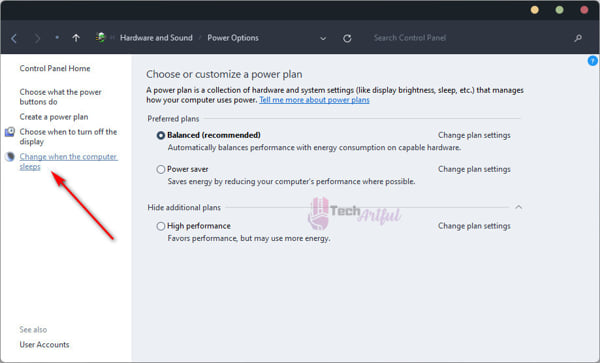
- Give your preferable time to make your desktop sleep then.
- Select Save changes.
9. Take Help From The Windows Troubleshooter
There is a built-in troubleshooter in every Windows 11, which allows us to solve the critical issues of this device. In the same way, you can use it to fix the sleep mode too.
- Open the Start menu of your device and search the Troubleshoot.
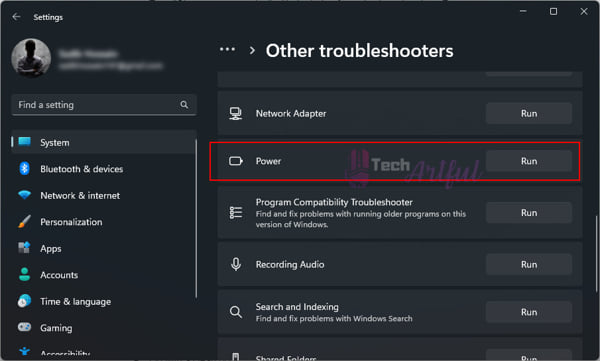
- Select the Troubleshoot Settings from the menu and click on Other Troubleshooter in the last option.
- Go to the Power option and select Run to commence the troubleshooting.
Overall Steps To Fix When Windows 11 Won’t Sleep
So far, we got to know the potential steps that help to fix the PCs which do not go to sleep. But we give a glance at the overall traits that need to be applied first.
- Disable the Fast Startup setting
- Run your PC’s power troubleshooter
- Go with a clean boot
- Take out the battery
- Scan your desktop to remove the malware and virus
- Update your drivers
- Update your Windows 11
- Eliminate all unwanted peripheral devices
- See if there are any power requests
FAQs
How to fix sleep mode and shut down Windows 11 at the same time?
Here are some short steps below to fix your PC’s sleep mode problem:
- Use the Power Troubleshooter of Windows 11
- Check if all the recent drivers are updated or not
- Update all settings of the hard disk
- Do not forget to change the power settings
- Keep all your lost files on track
- Be certain that ISP, websites, and other parties cannot have access to your file
How to put Windows 11 to sleep with easy techniques?
First thing first, you have to open the Windows Sign-In screen by pressing Ctrl -> Alt -> Delete. Then go to the right side of your screen and select the power icon; it is located below the right corner. And lastly, click Sleep. Your Windows 11 is all set to go into sleep mode.
How can you restart your frozen Windows 11?
Restarting a frozen Windows 11 is like a cakewalk if you follow the steps accurately. Just press the physical power button and keep holding it. If your PC shuts down, leave it instantly. Then wait for a couple of minutes and turn it on again. You will see your PC start to boot; that time, keep holding the power button for 3 to 4 seconds, and your Windows 11 will start again.
Why is upgrading Windows 11 important?
Microsoft mainly launched Windows 11 for innovative systems. By using it, you will hardly face any issues regarding its performance. So it is our first thing to upgrade the system to get newer features and facilities. Those who prefer updated versions of security must not avoid this task.
Conclusion
So, as you can see, sleep modes have numerous reasons for not being able to work. Since there are lots of methods given here, it won’t be difficult to figure out the exact one. However, when you see that the PC won’t go to sleep on Windows 11 as well if the version does not seem stable, what you need to consider first is to update your Windows.
Hope you have started trying out the steps and enjoying your sleep mode when required.