
Oculus Quest 2 is the sequel to the first Oculus Quest video game. Inadvertently, and in addition to providing enjoyment, Quest can tire out its participants by assigning them duties. The most common of these issues are controllers that do not track properly. The controllers utilized by default are the controllers that came with your Oculus Quest 2 VR headset.
![]()
They offer significant customization options and are frequently the only controllers that games support. However, the headset may become confused about where the controls are. You may be experiencing controller drift if the virtual reality (VR) controllers for your Oculus Quest 2 (formerly Meta Quest 2) aren’t working correctly.
If you’re having trouble with the Quest 2 controllers, try one of these workarounds to resolve the controller drift issue.
It may not be very pleasant when this happens again, or even just once, especially if you were so close to mastering a new Beat Saber tune.
How do you fix Oculus Controller not tracking
The Oculus Quest 2 is a cutting-edge piece of hardware. As a result, issues with this advanced technological equipment are with the foundation.
Here are the steps to fix Oculus two controller not tracking issues:
Check the Headset Tracking Cameras Are Clean
The cameras built into the Quest 2 headset allow you to observe both the controllers you’re using and the area around you. It should be no surprise that these cameras, and the tracking they enable, require a good view of the region to function well. This eyesight is necessary for the cameras to work effectively.
Check to ensure stickers, decals, or anything else have obscured no camera lenses. Even if nothing appears to be blocking the lenses, it is a good idea to give them a quick wipe clean because debris on the lens can potentially cause tracking issues.
Reboot Oculus Quest 2
This stage of repairing mechanical equipment concerns is only the beginning of the process. It is possible that simply restarting your computer will resolve a range of technical issues, including those relating to Quest 2 tracks.
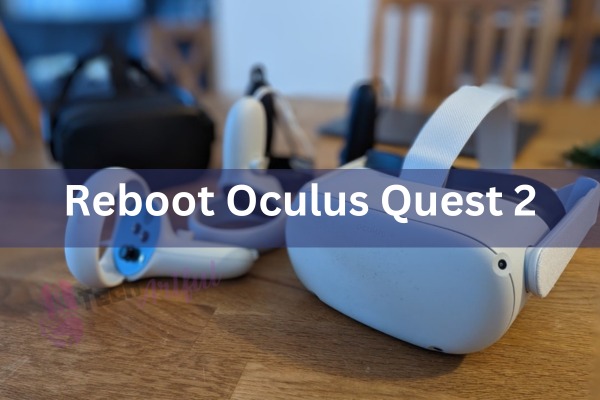
Here are the steps to reboot your Oculus Quest 2:
- Hold down the power button for the duration given until the restart option appears in the dialogue box that appears.
- Click on it and check whether it makes a difference in how your situation is handled, and report your findings.
LEDs and Mirrors
The headset follows the controllers throughout the room, which it does with the help of cameras. However, it is possible to accomplish this feat due to the inclusion of infrared LEDs into the system’s controllers. Other LEDs in customers’ homes, particularly Christmas lights, have been known to cause the Quest 2 to malfunction. A substantial number of clients made this discovery.
Huge mirrors or mirrors merely put in the wrong location can confuse the tracking system by providing it with conflicting information. If you are currently playing near a mirror, consider relocating it, covering it, or choosing a different play place.
Modify lighting conditions
Because it is a camera system, tracking can only be conducted when there is enough light. Ensure your playing area has adequate lighting, as tracking issues could arise if the lighting needs to be more robust or completely dark. However, be aware that excessive exposure to light, particularly direct sunlight, might cause difficulties.
Quest 2 was not intended to be used in natural surroundings, and its performance will probably degrade if it is subjected to direct sunlight or glare from the sun. When you’re inside, and there’s a lot of natural light streaming in through a window, try drawing the curtains or lowering the blinds to lessen the glare.
The lighting conditions, particularly in the place where you use the headset, may have a significant impact on the functionality of the Quest headset that you are presently using.
Here are some points which you should follow to set your room’s lighting conditions:
- Remove any bright illumination that could negatively impact and influence your headset.
- Remove everything from the room that even slightly reflects light.
- It is recommended that you inspect the screen of your computer display or laptop to rule out the possibility of interference with tracking.
After adjusting the lighting in your surroundings, restart your Quest 2 headset and test it again to see whether the tracking issues have been resolved.
Try Playing in Another Room
Suppose you make every effort to use your headset in the best possible lighting settings, but the problem persists despite your efforts. In that case, we recommend that you play the headset in a different room than the one in which it was initially used. This may solve the problem you’re having.
Electronic appliances, fluorescent lamps, and a variety of other items, for example, are among the many things that can interfere with the activity and performance of your headset. Numerous other things can accomplish this.
Delete Your Saved Guardians
Regularly, you get the benefits of one of the most significant benefits, which is listening to music or any other form of entertainment. The capacity of the Quest headset to track the environment is subject to being thrown off by seemingly minor changes in the background. It will resume where you left off, regardless of where you were in the procedure. The process of being a guardian for individuals you care about is the emphasis of this theme. As a result, you will be able to remove any guardians you have previously stored and replace them with new guardians.
Here are the steps on how to delete your saved guardians:
- Select Settings from the drop-down menu.
- Navigate to the Guardian’s position.
- Choose Clear Guardian History from the menu options.
Unpair and Repair Your Controllers
If the problem persists, you have the option of implementing the proposal regardless of the outcome. This will necessitate the disassembly of your controllers and their subsequent re-assembly. The controllers can be tracked by using the headset in this manner.
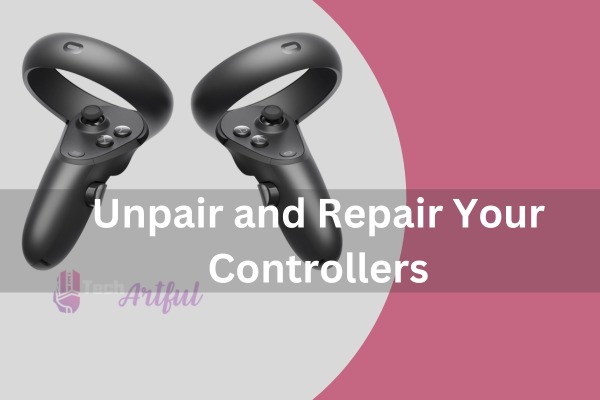
Here are the steps to unpair and repair your controllers:
- Navigate to the Settings area.
- First, pick your headset from the menu to access your controls.
- Select a controller from the available options.
- Remove the shoes from the controller’s grasp.
- Repair the computer’s controller as needed.
- For each additional controller, repeat the instructions beginning with step three.
If you are still having tracking issues, make sure that everything is thoroughly examined and tested.
Use Hand Tracking in a Pinch
If you weren’t aware, you don’t need your touch controllers to play the original Quest or its sequel, Quest 2. You can use the hand-tracking capability with only the hands that are attached to your body if the software on your headset has been upgraded to at least the version that allows the feature. After putting on the headset, place both hands in front of your face and avoid using the touch controllers.
After you finish this stage, the hand-tracking feature will be activated, giving you access to all of the Quest’s options. This feature is supported by other games and apps as well, but in this case, it serves as a valuable alternative to the touch controllers for gaining access to the settings. Other games and apps also support this feature.
Turn off Hand Tracking
Because Oculus Quest headsets may instantly switch between controllers and hand trackers, this may occasionally present challenges while attempting to monitor controllers.
Here are the steps on how you can turn hand tracking off:
- Select the Settings option from the menu.
- It would be best if you located Hands and Controllers and then selected the active one.
- You can disable the Hand Tracking feature by tapping the toggle button on the screen.
Disable 120Hz Refresh Rate Mode
We had a large number of reports on the aforementioned subject up until this point. As a result, use this one if you try all of the remedies listed above, and your performance does not improve as a result. This is the best solution. However, this is a one-of-a-kind circumstance that occurs only when the mode with a frame rate of 120 Hz is selected when using Oculus (Air) Link. It would be best if you went into the Settings section to change the frequency from 120Hz to 90Hz. Return to this page in a few minutes to check whether the situation has improved.
Update Your Device
Undoubtedly, the technology you are currently using is at the leading edge of its field. To put it another way, the hardware has been updated, but has the software been kept in its original state? If this is not the case, and there is a good chance that it is, this would be the source of your tracking difficulties.
It’s also plausible that this is the case. By minimizing extraneous distractions, you can ensure that your device’s software is up to date. The moment you connect your device to a Wi-Fi network, it will immediately begin upgrading itself. Please keep the following issues in mind as you go through this list:
- After receiving a full charge, the battery has reached its maximum capacity.
- Your headphones’ volume has been increased.
- The Quest is always kept on a level surface and is never impacted by any outside motion.
- Please make further efforts to guarantee that the interior sensors are not blocked for the predetermined period.
Do Headset Factory Reset
Give it one more shot after you’ve tried everything else, and nothing else seems to be working. It would be best if you did a factory reset to restore your smartphone’s default settings. We’re crossing our fingers that your quest controller will begin appropriately recording progress very soon. Keep in mind that if you perform a factory reset on the device, all of the information linked with your accounts and any games or other content you have downloaded will be erased.
As a result, before you proceed, make sure that you have no reservations. And if it fails again, there must be an issue with the hardware on the other side of the equation.
Move Away From Signal Interference
The Quest Touch Controllers use radio waves that are broadcast wirelessly to communicate with the headset. They are sensitive to interference, much like all other wireless systems. Consider whether there are any strong sources of interference near where you’re using the headset. Even though the Touch controllers do not appear to use standard Bluetooth, it is almost transparent that they function on the same 2.4 GHz frequency as Bluetooth and certain Wi-Fi bands.
We know this because we were able to confirm it. If your airspace is congested with a lot of radio traffic operating on the 2.4 GHz frequency, interference may develop.
Controllers Are out of or Low on Battery
A single AA battery is required for each of the Quest 2 controllers to function correctly. Although the controller batteries have an impressive level of endurance, they will eventually run out of power and must be replaced before they can be used again. As the amount of remaining battery life decreases, you may notice an increase in the frequency of controller tracking issues. If any of your batteries’ charge levels are low, it is recommended that you try to replace them.
If you are having problems using rechargeable batteries, consider switching to conventional AA batteries that are only good for one use. This helps with problem tracking. Rechargeable AA batteries deplete their power faster than single-use batteries.
In addition to replacing the batteries, it is advised that you restart the headset. This is a constructive tip. It is feasible to solve a wide range of problems this way.
Change Tracking Frequency
LEDs, as previously said, are renowned for making it challenging to maintain track of moving things. LED lights generally do not encounter the same problem; nonetheless, this does not rule out the possibility that they are the source of the problem. Electrons flow across their surfaces when current is fed through LEDs, allowing them to emit light.
Depending on where you live, the alternating current (AC) pulses used to power houses are delivered at a frequency of either 50 or 60 hertz (Hz). The LED will turn on and off in fast succession as a result of this power pulse, but it will be entirely off in the interval between pulses.
Because of the high frequency at which these pulses are created, it is technically impossible to see the pulses themselves; nevertheless, if you close one eye, you may be able to sense an LED light flickering. This is due to the high frequency with which these pulses are produced. It will be much easier to identify the effect if you use your phone’s camera.
On the other hand, you will notice a unique flickering effect in the vast majority of cases; this is something that does not occur in the presence of natural illumination and can be noticed much more clearly with a slow-motion video camera. The Quest 2’s head-mounted display attempts to automatically correct for the flickering rate of LED light bulbs.
This compensation is performed hands-free. However, if you are experiencing tracking issues that you are unable to resolve, you can override the setting manually. This is only advised in exceptional circumstances. You can modify this setting by going to the settings menu, selecting the Device menu, and then selecting Automatic, 50 Hz, or 60 Hz from the drop-down menu that appears after you make your pick.
Repair or Replace The One in Control
You can purchase a replacement controller from Meta, which costs around $75 at the time of this writing. This option is accessible if you are unable to cure the stick drift in your controller, no matter what you attempt. We strongly encourage clients to avoid purchasing refurbished or third-party controllers from online retailers such as Amazon because we have read several customer complaints claiming that the goods in question do not perform correctly.
It is possible to fix the controller by replacing the stick sensor by purchasing replacement modules; however, because this is a third-party solution, you do it at your own risk! If your Touch controller is already out of warranty and you don’t mind taking a risk that could cost you more than if you had purchased an official replacement in the first place, it can’t hurt, except monetarily.
It can be okay if you don’t mind taking a risk that could cost you more than buying an official replacement in the first place.
The Two Types of Oculus Quest Controller Drift
If you ask two different people what they mean when they talk about the Oculus Quest 2 controller drift, you’ll likely get two other answers. Stick drift is the most typical form of drift. This occurs when the controller’s thumbsticks continue to register input even when they are set in the neutral position.
Because of this, your character might keep moving, or the camera might spin around even when you aren’t touching them, which will make the experience you are trying to have with the game far worse.
The second kind of drift that might occur is called sensor drift. Only virtual reality (VR) systems, such as the Quest or an older version of the Oculus Rift, can experience this issue. It happens when the positional sensors attempt to track the headset’s location and controller’s location but generate incorrect data. This may manifest as a drift in the tracking of the controller or even the entire virtual reality environment. This form of VR-specific drift is addressed by several improvements that are mentioned further down.
Troubleshooting issues that only appear on rare occasions might be a significant annoyance. You should be able to remedy the bulk of the controller tracking issues you are now experiencing if you carefully follow the instructions given in this article. If this does not address your problem, you should contact Oculus support.
To summarize, the Oculus Quest 2 is a sensitive piece of technology that should be handled with caution at all times. As a result, the questions that it presents are incredibly nuanced and difficult to address. On the other hand, we have handled nearly all of the numerous choices available to you to better your current situation. We are confident that any of these will solve the problem you are now experiencing.
FAQ
How do I fix my Oculus controller not tracking?
If your Rift S occasionally loses track of your Touch controllers while in use, you can fix the problem by following these steps: Replace the batteries in your touch controllers in their original places. Check that each of your touch controllers has enough battery life. If the levels are low, the batteries should be replaced.
How can you resync a Quest 2 controller?
Recording Devices Under the Headset Settings menu, select Controllers, then use the Left or Right buttons to select the controller you want to associate with your headset. To complete the connection, press and hold the buttons on your suitable controller or the buttons on your left controller until the LED on the controller blinks and then lights up.