
AMD Radeon Settings is a very important tool for improving the stability and performance of your computer. You can easily tune up your hardware like graphics cards with this mighty software.
Having the ability to manage all of your graphics card settings and improving the performance manually makes AMD Radeon Settings a great tool for advanced users.
However, on the contrary, so many users reported a complaint saying AMD Radeon Settings, not opening or AMD Radeon Settings won’t open on their computer.
There can be so many possibilities that can cause the problem. So, we came here with this article where you can find all the solutions to solve the issue.
Causes of AMD Radeon Settings Not Opening Problem
There can be so many possibilities that can cause this problem. Identifying one can be a tricky task for you. But, fear not. Here is a list of the most obvious causes of this particular problem. Knowing the cause will help you to understand what method you need to apply to fix the issue.
Faulty Graphics Card Drivers: Having faulty graphics card drivers is one of the most common or can be the main culprit behind this issue. By updating the drivers may resolve the problem if you are lucky.
Outdated Windows Version: Update your Windows if you are using a backdated version. Microsoft always tries to solve the bugs and compatibility issues in the newer updates. So, updating the Windows may help you.
Version Incompatibility Issue: The version of AMD Radeon Settings and the version of the graphics card which is installed on your computer may be mismatched. That’s why you can face the problem. By using Registry Editor, you can fix the issue.
How to Fix AMD Radeon Settings Not Opening Issue
After doing some intense research, we have summoned some of the best solutions which will help you to solve the problem. But before beginning, make sure that you have restarted your computer because there can be so many processes running in the background. Restarting the system will eliminate them. However, now let’s move on to the solutions.
1. Try Installing an Older Version of the Driver
Windows 10 has a built-in feature named auto driver update. Because of this, all the drivers installed on your system will automatically be updated to the newer versions. It is a very handy feature indeed, but it can be futile.
Sometimes, in the newer version of updates, there can be so many bugs and problems that may make you face issues. So, by rollbacking the versions, you can solve the problem. To do that, follow the below instructions:
- Open “Device Manager” by searching on the Start menu. You can also open this by pressing Windows Key + R
- Once Device Manager is opened, type in “devmgmt.msc” in the dialog box and press OK to run it.
- When a new window opens, expand the Display Adapters section, as we are going to update the video card driver.
- Right-click on your graphics card and click on the Uninstall Device option.
- If any dialogues or prompts appear that ask you to approve the uninstallation of the current graphics device driver, confirm it. Then wait for the process to finish.
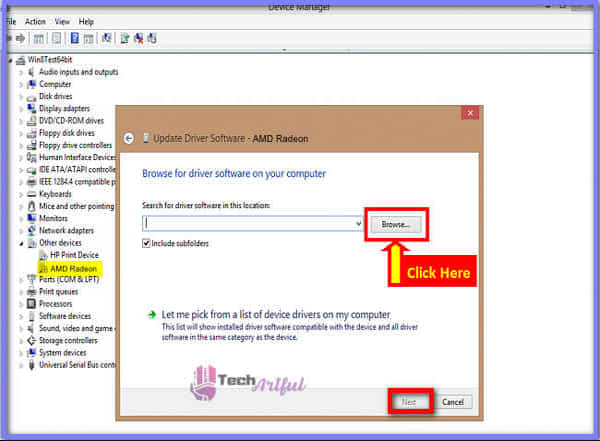
- After finishing the uninstallation process, download your graphics card driver from the official website of your graphics card company. Here are the Links for Nvidia and AMD.
- Provide all the necessary information and click on SUBMIT. Then you will be able to download the drivers.
- Now install by following the instructions on-screen.
Once you are done, check that it worked or not. If that didn’t work, then go to the following solutions.
2. Change a Registry Key
If the version of AMD Radeon Settings and the version of the graphics card drivers which is installed on your computer is mismatched, then this is the solution you are looking for. Version incompatibility issues can be the main problem. Hence, by using Registry Editor, you can fix the matter.
However, the method will be modifying a registry entry so that these two version numbers match. So, follow the steps below very carefully.
- Because we are going to delete a registry key, it’s a good idea that you safely back up your registry in case you need to revert. However, there is nothing to worry about. Because if you carefully follow the steps, there won’t be any problem.
- Type “Regedit” in the Start menus’ search bar to open the Registry Editor window. Or you can also open it by using Run. Press Windows Key + R simultaneously key combination and type “Regedit” in the box, then hit enter.
- Now search for the following key in your registry by searching at the left pane: HKEY_LOCAL_MACHINE\SOFTWARE\AMD\CN.
- Once you find the key, click on it and look for an entry named driver version. Then, right-click on it and click on the Modify option, which is in the context menu.
- Now an Edit String window will appear. Change the Value data section with value to 0 and click on OK to apply changes to your system. If any security dialogs appear while doing the process, confirm it.
Now, you will need to eliminate all AMD-related processes by using Task Manager. Continue to follow the below steps.
- Press the Ctrl + Shift + Esc buttons on your keyboard simultaneously to open Tak Manager. Or you can also right-click on the taskbar and then navigate to the Task Manager option.
- If it appears in compact view, then click on the More details button at the bottom-left section of the window to expand Task Manager. Now you need to look for all of the AMD-related processes which should be located right under Background processes. Then right-click on them one by one and click the End task option.
- Reopen the AMD Radeon Settings to check that if the problem persists or not.
Also, read our review on the best AMD CPUs.
3. Install the Latest Updates of Your Operating System
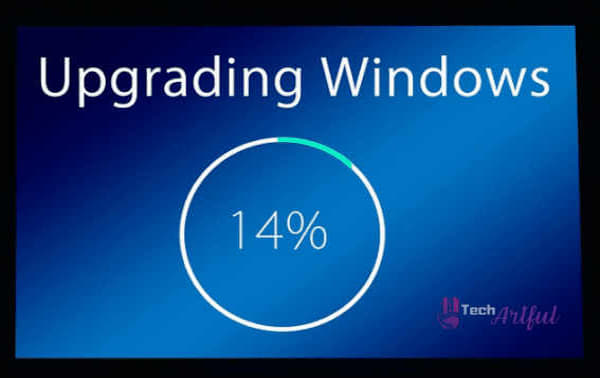
Sometimes, your Windows can be the culprit behind the problem. Because of bugs and other difficulties, you may face many issues. Hence, you can update the Windows if there is any. In this process, we will use Windows Powershell to update.
- Right-click on the Start menu and click on the Windows PowerShell (Admin) option at the context menu.
- If that doesn’t work or you see that Command Prompt opened instead of PowerShell, you can also search for it in the Start menu. Then make sure that you are opening it in admin mode by right-clicking on it and pressing Run as administrator.
- Once the Powershell console opens, type in “cmd” and wait for Powershell to change to the cmd like a window that may seem more common to Command Prompt.
- Type in the command which is given below in the “cmd” look like console, and hit Enter next: exe /updatenow
- Now stay still, because it can take at least an hour or more to update. But check back later to see if PowerShell found any updates and installed them.
4. Uninstall the Onboard Graphics Card Driver
Uninstalling the onboard graphics card driver may help you to solve the issue. Especially when you are using Intel integrated graphics cards, now follow the below steps to solve the issue like a charm.
- Open Device Manager by searching it in the Start menu. You can also open it by Run command. Press the Windows Key + R in combination, which will open the Run dialog box. Then type msc in the blank box, then hit on the OK or Enter button to proceed.
- Once a new window opens, expand the “Display Adapters” section to see all the installed related devices on your computer. However, clicking on the View from the top menu and checking the box next to Show hidden devices will also do the job.
- Now right-click on the integrated graphics card and click on the Uninstall device option from the drop-down menu. Make sure that you are not clicking on the AMD one.
- If any dialog window prompts, confirm it. Then close the Device Manager window and restart your computer.
After finishing these steps, reopen AMD Radeon Settings and see that it now launches without any issues.
FAQ
How do I fix AMD Radeon settings that won’t open?
Uninstall the existing AMD driver by using the Windows Uninstaller and then manually delete the AMD folder from C: drive. Next, uninstall the AMD driver with the DDU in Safe Mode, then restart the computer. Install the latest AMD driver as administrator. It should work.
How do I open AMD Radeon settings?
On your desktop, right-click on a blank area and select AMD Radeon Settings. Also, you can open it by searching or from the Programs menu.
How do I fix the Radeon settings that are not currently available?
You can try to reboot the Radeon graphics driver or reinstall it. If that doesn’t work, update the Radeon graphics driver.
Conclusion
Well, here my job is done. I hope the given solutions we described above will work to solve the AMD Radeon Settings not opening issue. Now it’s your turn to perform these steps and open the AMD Radeon Settings ideally.