In this day and age of scalpers, being able to get your hands on a PlayStation 5 is quite an accomplishment. No one doubts that NAT type 2 will be implemented, and those who are willing to go the extra mile may even hope that NAT type 1 will be implemented as well. The possibility of a failed NAT exists if your firewall is particularly protective and the PS5 cannot establish a reliable connection with the outside world.
You might have been attempting to open ports, set static IP addresses, or make any other network-level changes to your router at the time of the failure. A wide range of different problems can cause errors in a network.
If you make a mistake when playing about with your router and are unsure of how to remedy your mistake, you can always do a settings reset from the router’s configuration menu to correct your error. This will nearly always restore everything to its original functional condition, allowing you to complete the task at hand once more.
What Does NAT Type Failure Mean On PS5
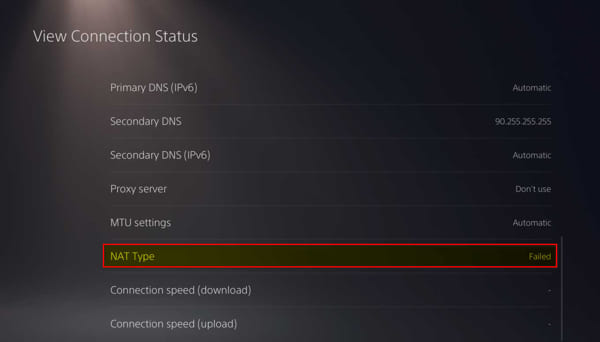
When you experience Network Address Translation (NAT) failure, it signifies that something is wrong with your network connection. Depending on the situation, it is possible that you have a limited internet connection or that the network administrator has blocked the ports essential to access the PSN network.
The failure of the NAT type will prevent you from initiating a PS party chat session on your machine in this case. In the great majority of cases, repairing a failed NAT is a straightforward process that can be completed in minutes. However, although many mistaken ideas claim that it is possible, it is impossible to change the setting on the PS5 to allow NAT type 1 communication.
You will need to configure your network router to open various ports and assign a static IP address to the PlayStation 5 for it to operate correctly. NAT type 1 will be required to get past this hurdle, so keep that in mind. This may be accomplished by allowing some communication ports on your internet router to be opened up for use by other devices.
NAT type 1 may be installed on the PlayStation 5 using the comprehensive instructions accessible online, including a video demonstration. You may find it by clicking here. Despite your prior experience, the procedure is not nearly as complicated as you may believe it to be. Anyone interested in taking on the task but requires some assistance can feel free to leave a comment when they get stuck, and I will provide you with some suggestions on how to finish it successfully.
Why Does NAT Type fail on PS5?
If you have a problem with your internet connection or a NAT Type 3 in your network setup, NAT Type 3 will fail on your computer. If your NAT type fails, it may be the consequence of a problem with your DNS server or your IP address in particular circumstances. Having a sluggish internet connection further increases the likelihood of this happening, making it much more irritating.
Another option is to contact your ISP, or your internet service provider, and explain the situation. If your NAT type does not operate properly, it is also possible that you may need to make adjustments to your DNS settings to make it work. It may be necessary to make further configuration adjustments to your router from time to time, such as enabling the DMZ/UPNP option on your router.
If your router firewall is blocking any of the PS5 ports, you will also need to port forward your router to connect to the internet to use the service. First and foremost, to understand the many variations of NAT, we must first know what they are in the first place.
How To Check NAT Type On Ps5
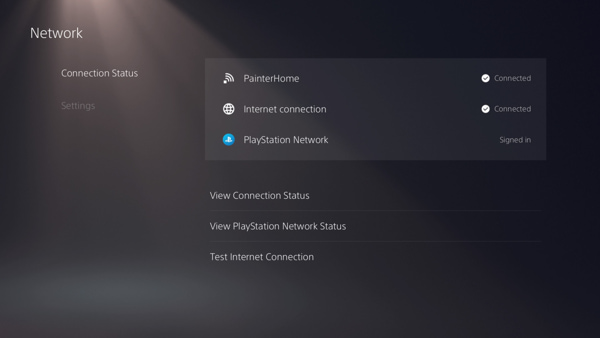
First and foremost, you must establish the NAT Type you are using and how to discover it before you can begin troubleshooting. Select Settings from the PlayStation 5’s main menu. From the drop-down menu, select a network to connect. Click Test Internet Connection from the drop-down menu to check your internet connection.
The information about your Internet connection on the PS5 will be available to you after 10 seconds, including the type of network adapter used on the system (NAT).
Reason for PS5 NAT Type Failed
It is possible to receive the PS5 NAT Type Failed error message from time to time simply because there is a problem with the network infrastructure. Only your PlayStation 5 is affected by this issue; nevertheless, the network is fully operational on all other devices. As a result, you will need to modify the network settings on your PlayStation 5 console as described below.
A problem with your network configuration may be the root of your problem (incorrect network settings). A firewall may be preventing you from gaining access to the system. It is critical to make modifications to the DNS server settings.
How To Fix NAT Type Failed on PS5
Therefore, the PS5 NAT Type Failed problem on the PlayStation 5 console must be resolved immediately. NAT failure is the most likely cause of this, suggesting an issue with the network infrastructure. To ensure that the problem is resolved, you’ll need to double-check everything until the problem is resolved.
As a result of the evidence, you must first assess your network setup, including UPnP settings, a DMZ setting, a DNS server setting, and port configurations. A mistake with one of the settings on this list may result in a NAT type failure on your PlayStation 5.
Use Ethernet Cable
This is the most straightforward and most practical answer to your problem. Even when playing online with your friends, you may download at the quickest possible speed without sacrificing quality by connecting your computer to the internet using an Ethernet cable. Then, disconnect your WIFI connection from your PlayStation 5, and turn off your PlayStation 5. After that, connect your router to your PlayStation 5 with an Ethernet cable. All done; you’re done with this project now. If your NAT is configured to be open, you may test your internet connection to see if it is functioning correctly.
Setup Port Forwarding on your router
It is required to port forward your router to enable your NAT type to function correctly. As a result, we will offer you essential instructions on how to do so, as the approach varies from Router to Router, although the main procedure is somewhat similar. First and foremost, you must get a static IP address before utilizing port forwarding. So let’s go to work on putting one together.
STATIC IP: Go to the command prompt and type ipconfig /all, followed by the enter key, to complete the configuration. Identify the IPv4 address, Subnet Mask, and DNS Servers on your network and make a note of them. Navigate to the control panel and choose View network status and tasks from the drop-down menu. Then select Change adapter settings from the drop-down menu.
Change adapter settings may be accessed by right-clicking on the adapter and selecting properties from the context menu that appears. Look for Internet Protocol Version 4 (TCP/IPv4) in the search results and click on it to choose it. Change the last credential and keep it between 1 and 254 in the range of possibilities.
IPv4 address, Subnet Mask, DNS Servers, and other related subjects are good writing themes. Paste the site address you previously copied and pasted into the text box. A static IP address will be assigned to your computer as soon as you click OK. For anyone having trouble with your PS5 not-reading discs, here is a complete guide on fixing it. TECHNIQUES FOR PORT FORWARDING INCLUDE: Returning to port forwarding after installing your static IP, let’s see how it works.
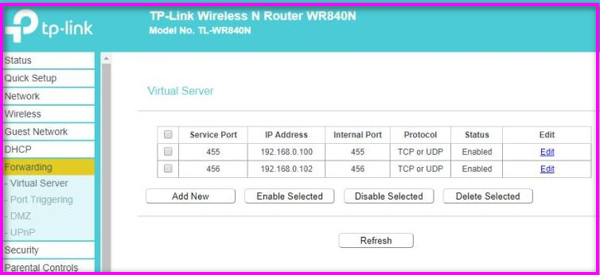
Use your web browser to log into your router and configure it. Find the port forwarding section, which is usually accessible under Advanced options on most computers. Input the IP address of your computer on the internet. The following ports should be configured on TCP: 1935,3478-3480, and the following ports should be configured on UDP: 3074,3478-3479. If the router is not functioning correctly, restart it.
Congratulations, you have successfully finished the procedure of port forwarding your router! By entering your IP address and the TCP port in the proper areas on this website, www.yougetsignal.com/tools/open-ports, you may determine if a port has been forwarded or not. When using portforward.com, you may search for your router and find out how to port forward it on the router of your choosing.
Afterward, you may complete the procedure on your chosen router by following the directions on portforward.com, which are available online. With this information, you can figure out what kind of NAT you have. Hopefully, it will be open when the time comes.
Manually Configure the PS5 Network Settings
You may be experiencing difficulties with your PlayStation 5 due to the wrong network configurations on your console. You must first confirm that your network settings are correctly adjusted on your PlayStation 5 to resolve the network connectivity issue it is experiencing. This video tutorial explains manually configuring the network settings on the PlayStation 5. First and foremost, let us go through the steps involved in manually configuring the network settings on your PlayStation 5.
To achieve success, you need to follow the procedures and put them into action on your PlayStation 5 system. To bring up the Command Prompt on your PC or laptop, press Win + R and then type [CMD] > [Enter] into the address bar (command prompt). After that, type the command ipconfig/all and click the enter key to complete it. You will need to memorize or jot down the IP address, the default gateway, the subnet mask, and the DNS server at this point to complete the process successfully.
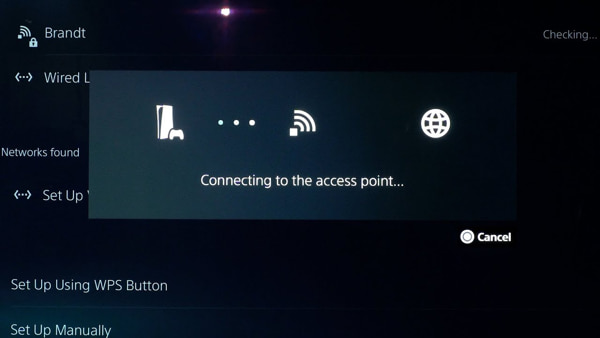
Then, select PS5 Settings as your destination from the drop-down menu that appears. It is possible to select a network from the drop-down menu. Select Set Up Internet Connection from the drop-down menu to begin the setup procedure. There are two options accessible to you in this situation: Using Wi-Fi and Using a LAN Cable are also available; select the option that corresponds to the network to which you are currently connected from the drop-down menu. Then, in the text box that appears, type in the network information you just wrote down.
It is also possible to select [Do Not Use] as an alternative to [Proxy Server]. When you see the message [Internet settings have been updated], select [Test Internet Connection] to run a test on your internet connectivity. Your PS5 Internet connection’s status, as well as the type of NAT to which it is linked, will be displayed on the screen. Check to determine if the NAT Type Failed on the PS5 problem has been fixed.
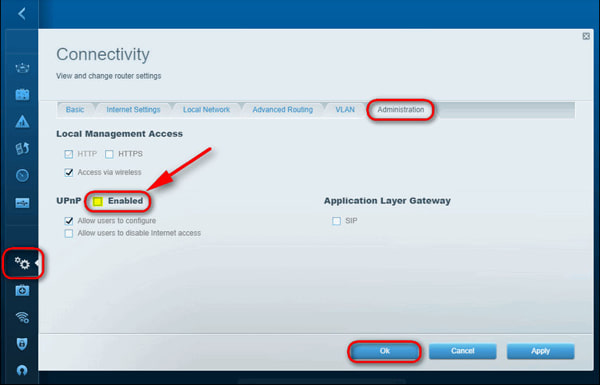
Enable UPnP (Universal Plug and Play) for your router
In most cases, manually configuring the network settings is a successful way. Devices on a network will discover and communicate with one another thanks to the UPnP protocol. You will be able to enjoy improved connection quality while playing games and hosting parties with your colleagues and other people as long as the UPnP option on your router is enabled. It is necessary to access (log into) your router to enable UPnP functionality on it.
Your router will launch a browser, where you may enter the router’s IP address, as well as the username and password you created, to get access to your network. The UPnP port of your router may be located in a different tab altogether, or it may be located under [Advanced] > [Forwarding] > [UPnP] on your router. Choosing Apply/Save from the drop-down option will allow you to save your configurations.
As a last resort, restart the router. Now navigate to [Settings] > [Network] > [Test Internet Connection] on your PS5 and follow the on-screen prompts. After the test internet connection has been completed, the type of NAT will be displayed on the screen in the status bar.
Enable the DMZ (Demilitarized Zone) server
According to the United Nations, a Demilitarized Zone (DMZ) is a physical or logical subnetwork that exposes externally facing services to an untrusted network and is defined as a physical or logical subnetwork. The failed NAT type issue will be attempted to be resolved by enabling DMZ on your PS5. It is possible to significantly increase the performance of your network when the DMZ (Demilitarized Zone) is enabled and configured correctly on your router (see figure).
However, it is critical to double-check that all of the router’s configuration options are right. The security of networks is a significant source of anxiety for many people concerned that they may jeopardize their personal information. This isn’t a problem until you start using it in your own home. However, I recommend that you only use this setup on your router and not on a public network, as this can cause problems. By configuring your router’s network options and establishing a dependable network connection on your PlayStation 5 console, you can save time and money by utilizing the DMZ feature.
Create a DMZ on the network interface card of your router by configuring it. To begin, make a note of the IP address of your PlayStation 5. Create an account using the username and password associated with your router and log in. Several different IP addresses can be used to identify the router, such as 192.1680.1, 192.1681.1, 192.16831.1, and so on. Depending on the manufacturer, the router’s IP address may be different. You can enable a virtual private network by going to [Advanced] > [Forwarding] > [DMZ] and selecting the Enable DMZ check box.
Input the IP address of your PlayStation 5 gaming system in the box provided. If your router, such as the NETGEAR router, supports NAT filtering, you can also tick the option to have NAT filtering enabled by default on your network. If your router does not have this feature, there is no need for action. Finally, click the Save/Apply Changes option to complete the process.
As a result, restart your router and wait for it to connect. If this technique worked for you, you should see Type 1 or Type 2 mentioned in the [Settings] > [Network] > [Test Internet Connection] menu on your PS5. If this procedure did not work for you, you should see Type 3 or Type 4.
Contact your ISP
Unfortunately, this is your only remaining alternative at this point. Alternatively, if you’ve done everything and it’s still not working on your PS5, you’ll need to contact your Internet service provider and let them know about the problem. You can’t fix the problem because there is no way to fix it from your router’s perspective if there is a problem on their end.
By contacting them directly, you can determine whether they have any firewall restrictions for PSN servers. Hopefully, your matter will be resolved as soon as possible. Also, see our tutorial on how to troubleshoot a PlayStation 4 problem. It is unable to be turned on. Contact-internet-service-provider Except for one tiny tweak, the method is essentially the same if you’re here for your PlayStation 4.
Consider deactivating IPv6 on your network if you’re using your PlayStation 4 to browse the internet. It’s conceivable that it will be effective for you as well.
However, while the PlayStation 5 provides an actual next-generation console experience, complete with excellent graphics, a sleek design, and the DualSense controller, it is also susceptible to connectivity issues, just like any other piece of connected technology. Fortunately, the PlayStation 5 is not vulnerable to connectivity issues.
Because it restricts who you can play with online, it causes longer matchmaking sessions and makes it more difficult to converse with friends in a group chat. For most console gamers, NAT Type is the most significant issue because it limits who you can play with online, leading to longer matchmaking sessions and making it more difficult to converse with friends in a group chat.
If any of these issues appear to be related, they are probably the consequence of a Moderate or Strict network access control system. You will need to conduct some study on Port Forwarding to do this, but the good news is that you can easily alter the NAT type of your PS5 from Closed to Open.
FAQ
What is causing my PS5 to report that the NAT type has failed?
The NAT type failed error message is often displayed when there is a problem with your network.
How do you fix NAT-type failure on PS5?
To resolve the NAT Type Failed issue on the PlayStation 5, you must follow the steps outlined above.

